Customize a Google auth form using Firebase

The default configuration of authentication projects in Firebase is to display a firebaseapp.com domain. The goal of the article is to add a custom domain to an authentication from Google that is using Firebase.
1. Authorize domain in Firebase Console

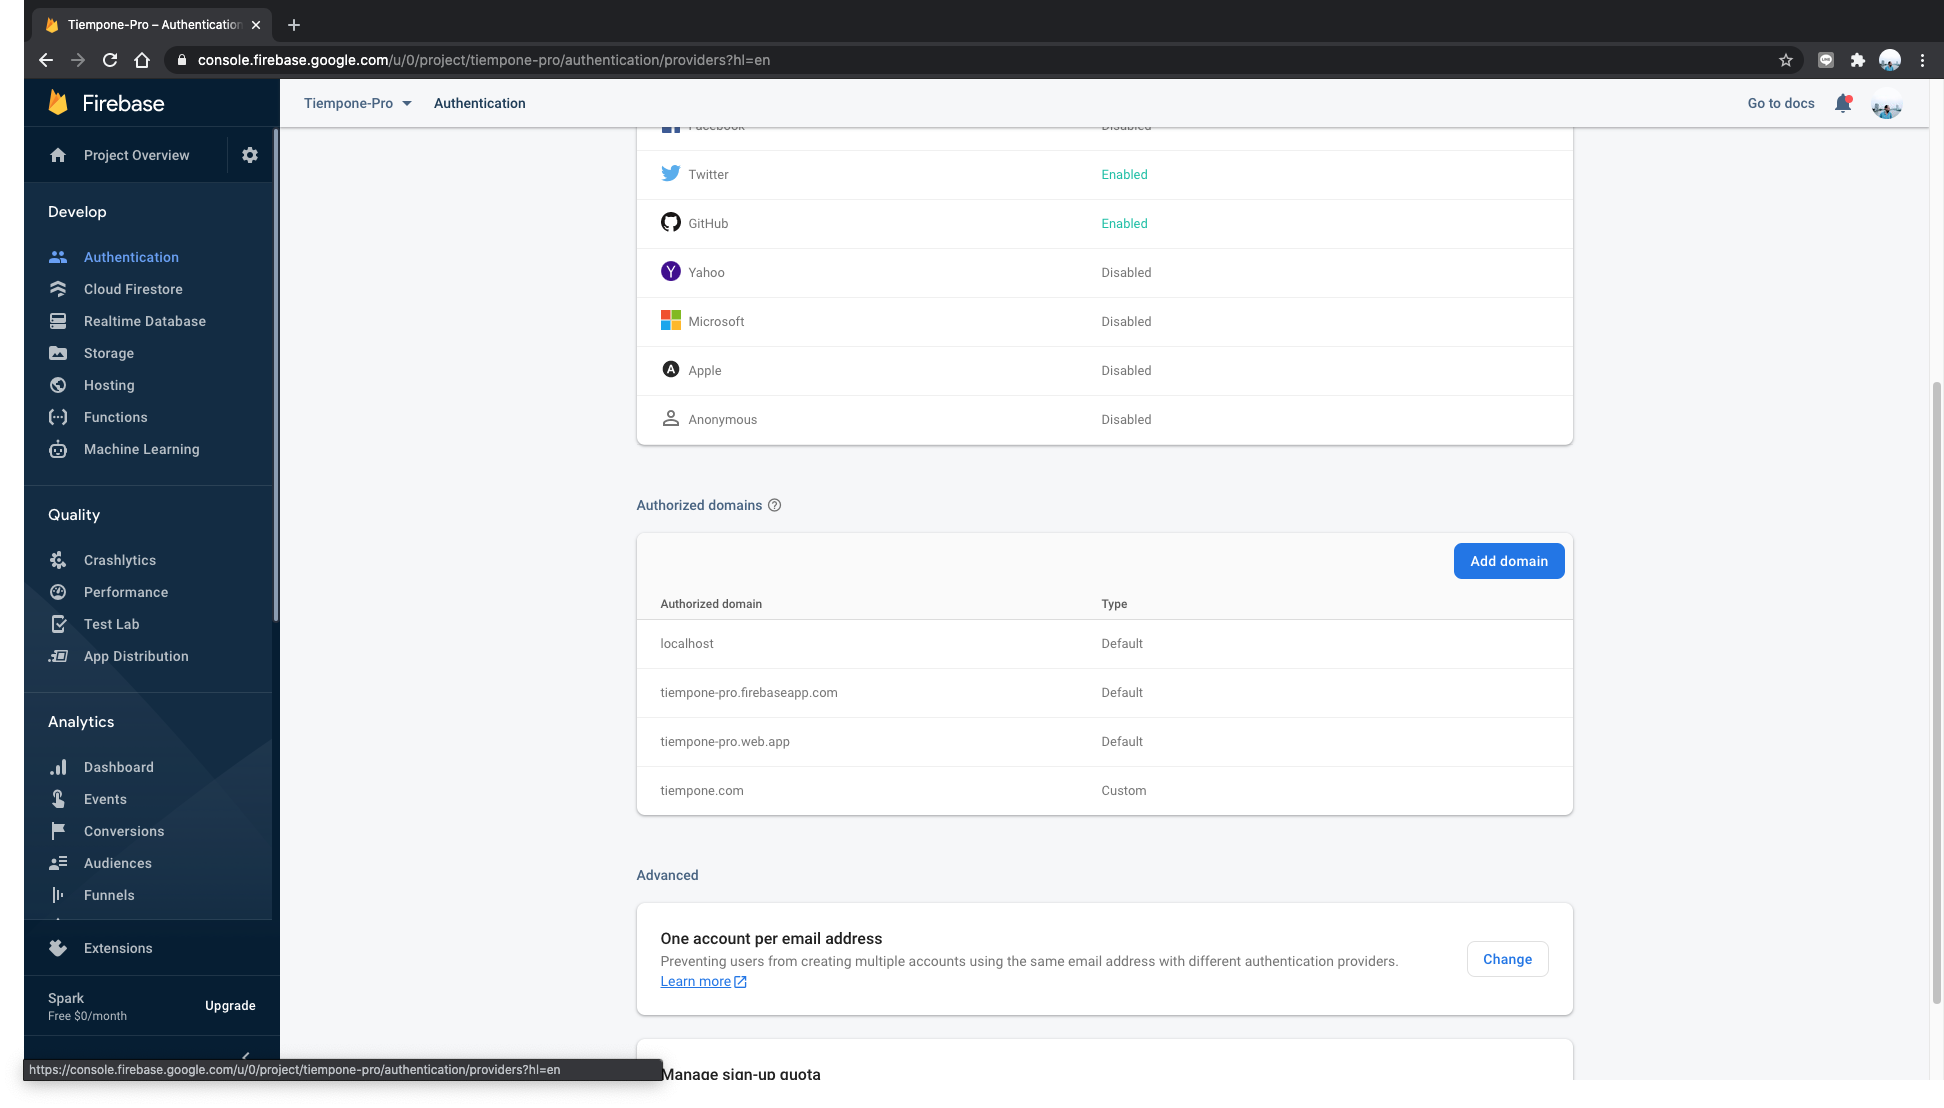
- Go to Firebase Console.
- Authentication > Authorized domains
- Authorize your domain
YOUR_DOMAIN.com
2. Modify Firebase's configuration file
Configure authDomain in Firebase configuration file:
javascriptvar config = {
    apiKey: "IJEIORJkdnfknKSLDFojeowjriojF",
    authDomain: "YOUR_DOMAIN.com", // ↪ Modify field with your domain
    databaseURL: "https://whatever-whatever.firebaseio.com",
    projectId: "whatever",
    storageBucket: "whatever.appspot.com",
    messagingSenderId: "770510296906",
    appId: "1:7874565615:web:89789ESR784f1C566"
}
3. Authorize OAuth origin
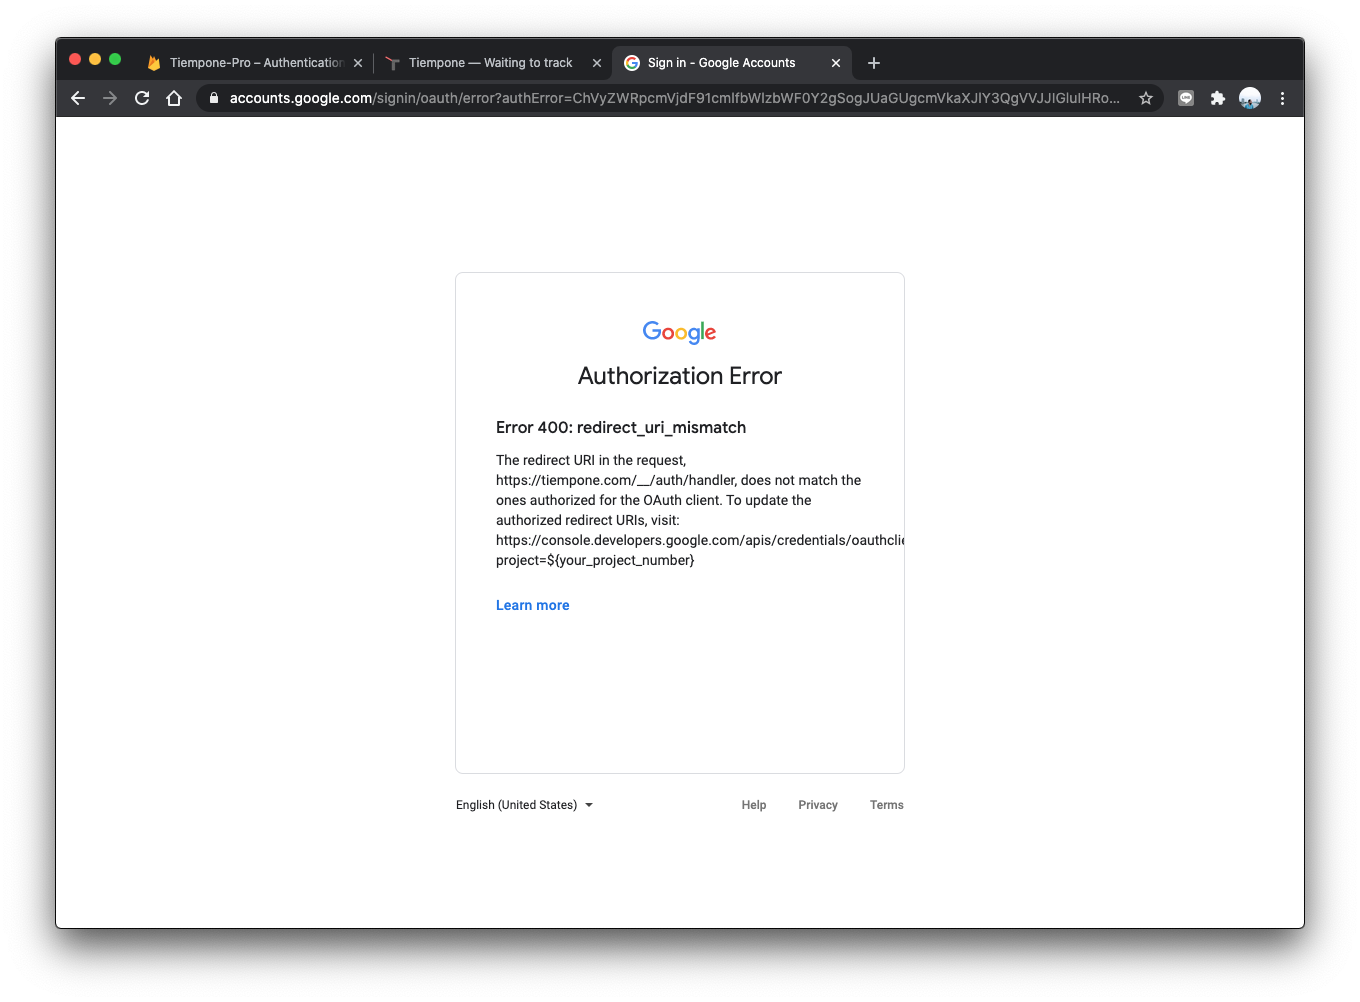
If you try to login after these 2 changes, you'll get a redirect_uri_mismatch error:

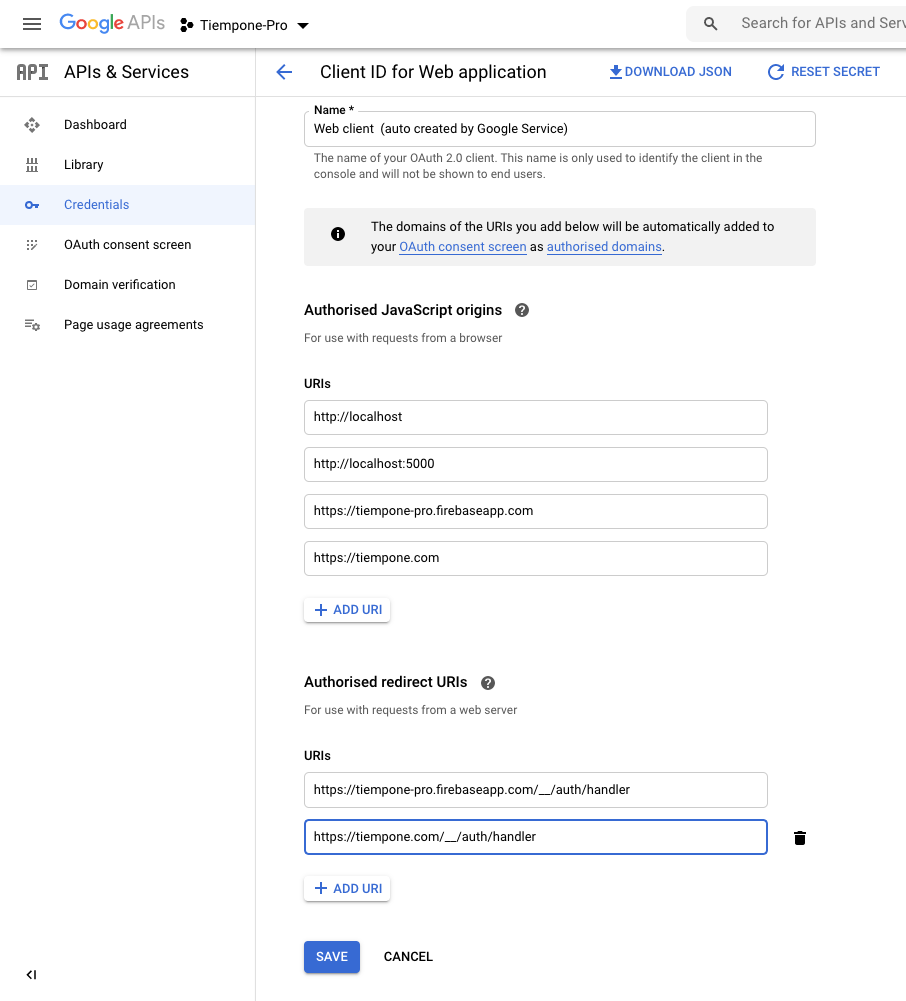
To solve it, you'll need to authorise your domain from the Google APIs Console:
- Go to Google API's Console
- Credentials > OAuth 2.0 Client IDs
- Add your domain in Authorised JavaScript
- Add your domain plus
/__/auth/handlerin Authorised redirect URIs

Et voilà.
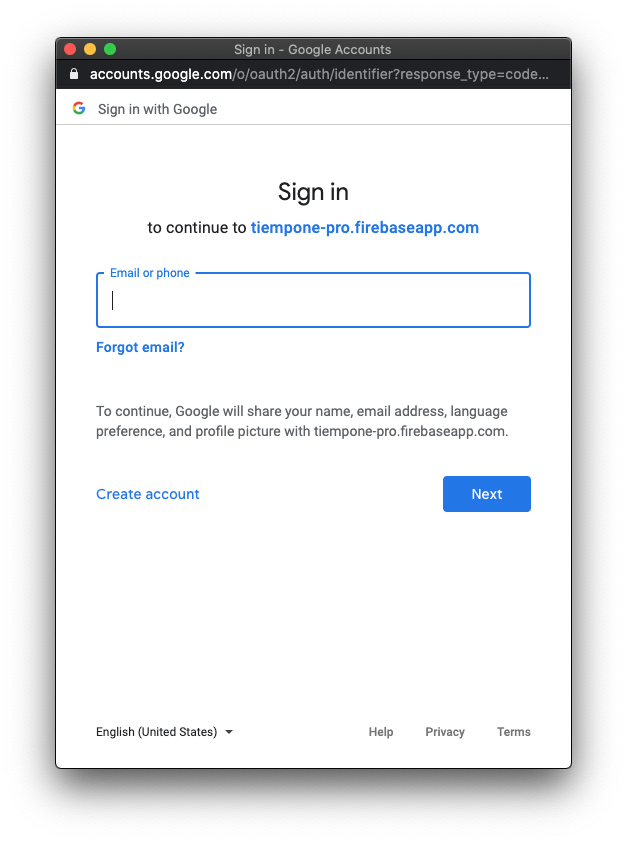
At this point you will see your domain in the authentication form:

4. Add an icon (optional)
If you want to add an icon to the authentication form:
- OAuth consent screen > Edit app
- Application logo
Sometimes you'll need to submit for verification before to see the logo in the authentication form. You'll need a privacy policy URL and the process can take several days to complete.
Hi, I'm Erik, an engineer from Barcelona. If you like the post or have any comments, say hi.